Your Cart (0)
Your cart is empty
Tax included and shipping calculated at checkout
Drawer menu
Tax included and shipping calculated at checkout

Last Updated: October 4, 2026
Most buyers start by comparing price tags and hoop sizes, then wonder why the machine they chose feels wrong three months in.
Embroidery machine comparison is the process of evaluating machines against your specific projects, space, and budget rather than against each other in the abstract. A machine that's perfect for monogramming napkins can be a poor fit for hats. A budget-friendly model that delights a hobbyist can stall an Etsy seller within a season.

That's why we built a five-point framework.
Every machine decision comes down to five questions. Answer them in order, and the field narrows fast:
Buyers who skip straight to brand names tend to overpay for features they'll never touch. Buyers who work through these five points usually land on a machine they keep for years.
U.S. Small Business Administration guidance on choosing business equipment makes a related point for anyone buying for a business: match the purchase to your actual production needs, not to what looks impressive on paper.
Embroidery area is the maximum design size a machine can stitch in one hooping, and it's determined by the largest hoop the machine supports. This is the spec that quietly eliminates half your options, so it deserves more than a glance at the box.
Three numbers control what you can actually stitch, and they are not the same number:
A common pattern is a machine rated for a 5" x 7" field that ships with a 4" x 4" hoop. The field is real, but you cannot reach it until you buy the larger hoop. Check the included hoop list, not just the maximum field, before you compare prices.
Here's how the common sizes shake out:
| Hoop Size | Typical Embroidery Area | Best For |
|---|---|---|
| Small | Roughly 4" x 4" | Monograms, small logos, baby items |
| Medium | Roughly 5" x 7" | Shirts, totes, most home projects |
| Large | 7" x 12" and up | Jacket backs, quilting, large designs |
The hoop is not just a frame, it's a tool, and the type changes what you can stitch:
Measure the widest and tallest points of your most common design, then add roughly a half-inch of margin on each side for fabric movement and pull compensation. That number is your minimum field. If your typical design is a 6-inch logo, a 4" x 4" field is a dead end no matter how good the price looks.
A large field is not automatically better. A bigger field usually means a bigger, heavier, pricier machine, and if your work is monograms and small logos, that capacity sits idle. Match the field to the work, not to the spec sheet's greatest hits.
A single-needle machine uses one needle and threads one color at a time, so you swap spools between color changes.
For a hobbyist stitching a few designs a week, a single-needle machine is the practical choice.
Multi-needle machines earn their keep in production settings. If you're running an embroidery business and stitching the same logo across dozens of garments, automatic color changes save hours every week.
The honest limitation: multi-needle machines are larger, cost significantly more, and are overkill for someone embroidering gifts a few times a month. Don't buy production capacity you won't use.
The best embroidery machine for beginners is one with a large touchscreen, automatic needle threading, and a healthy library of built-in designs. Those three features remove the steepest parts of the learning curve.
Beginners consistently underestimate how much the interface matters. A clear screen with on-screen guidance lets you learn the machine's logic instead of fighting it.
SINGER® SE9180 Sewing & Embroidery Machine →
Built-in designs matter more than most shoppers expect. A machine that ships with a large design library lets you start stitching on day one, before you've learned digitizing software.
Our recommendation for most beginners is the SINGER® SE9180 Sewing & Embroidery Machine.

Hats and sweaters are the two projects that expose a machine's real limits. Hats need a machine that can handle a curved, structured surface.
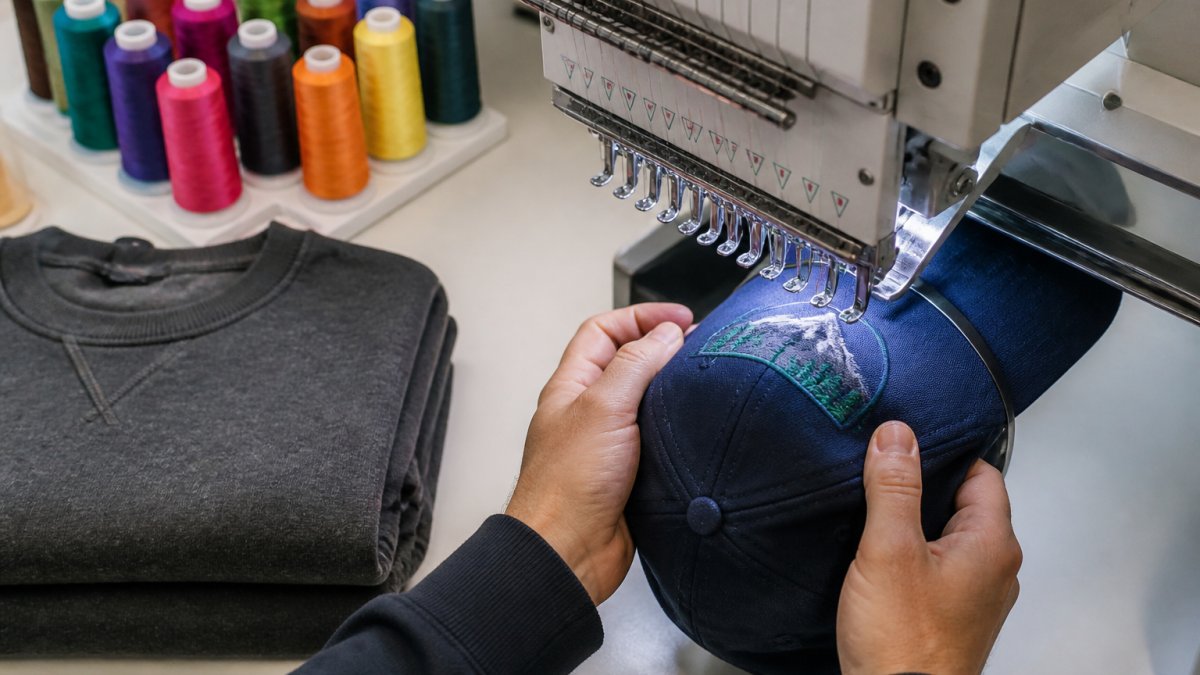
For hats specifically, you need a machine that supports a cap frame or cap hoop. Not every machine does, and it's rarely the headline feature.
Sweaters and heavy knits are a different challenge.
If you want one machine that handles both, look for a model with a wide embroidery field, cap-frame compatibility, and speed control.
The purchase price is only the first cost. Total cost of ownership includes everything you'll spend to keep the machine stitching for the next several years, and it's the number most buyers never calculate. Competitors list the categories; the useful move is to weight them and turn them into a comparison you can run before you buy.
Instead of comparing sticker prices, build a simple five-year estimate for each machine you're considering:
A cheaper machine with a small design library can end up costing more than a mid-range model once you add software and hoops. Run the math before you commit.
A lower sticker price usually shifts cost into one of three places: a smaller design library (pushing you toward software sooner), fewer included hoops (pushing you toward accessory purchases), or weaker support (pushing you toward repair costs and downtime). None of those are dealbreakers, but they are costs, and they belong in the comparison.
Federal Trade Commission guidance on warranty coverage is worth reading before any major equipment purchase, since it explains what warranty terms actually guarantee you, and warranty coverage is one of the costs this framework is designed to surface.
The same errors show up again and again when buyers compare embroidery machines. Avoiding them is easier than fixing a bad purchase.
Federal Trade Commission guidance on warranty coverage is worth reading before any major equipment purchase, since it explains what warranty terms actually guarantee you.
Comparing embroidery machines comes down to matching specs to your real projects, not to a spec sheet's greatest hits. That's the whole philosophy behind Stitch Pro Supply: learn first, shop second.
Focus on five things: embroidery area and hoop size, stitch speed, needle count (single or multi), built-in designs and fonts, and software compatibility. Also check the machine's maximum stitch count per minute and whether it includes a automatic needle threader. For home use, a 4x4 inch hoop handles most projects, while 6x10 inch or larger suits hats and sweaters. Write down your must-haves before comparing models so you don't get swayed by extras you'll never use.
Hoop size determines the largest design you can stitch in one pass. A 4x4 inch hoop works for monograms and small logos. If you plan to embroider jacket backs, quilt blocks, or large sweatshirt designs, you need at least a 6x10 inch hoop. Many machines include multiple hoops, so check what's in the box. A larger hoop also lets you reposition and combine designs, which saves time on bigger projects.
It depends on your order volume and color changes. A single-needle machine is affordable and great for one-off gifts, small Etsy orders, and personal projects. A multi-needle machine holds four to ten threads, so it changes colors automatically and runs production batches faster. If you regularly stitch multi-color logos on hats or polos, a multi-needle pays for itself in time saved. For most beginners, a single-needle machine is the smarter first purchase.
For hats, you need a machine with a cap frame or hat hoop attachment, plus a narrow embroidery arm that fits inside the cap. For sweaters, look for a larger hoop (at least 6x10 inches) and adjustable presser foot pressure to handle bulky knits. Check that the machine supports lightweight cutaway stabilizer and has enough throat space to move thick fabric without bunching. Speed control matters too, since dense knits stitch better at slower speeds.


