Your Cart (0)
Your cart is empty
Tax included and shipping calculated at checkout
Drawer menu
Tax included and shipping calculated at checkout

Last Updated: September 14, 2026
Most people learn how to choose an embroidery machine by scrolling spec sheets. That's backwards, start with what you'll actually make.

An embroidery machine stitches digitized designs onto fabric automatically, following a file rather than your hands. File, fabric, and design size drive every spec decision.
A 4-inch embroidery field can't stitch a jacket back; a single-needle model can't run a 12-shirt order without constant thread changes.
Before comparing anything, write down three things: your largest design, pieces per week, and whether this is for you or customers. Those answers eliminate half the market.
Single-needle machines use one needle and cone at a time, so every color change is manual. Multi-needle machines hold several cones and switch automatically.
For hobbyists stitching one or two designs at a time, a single-needle machine is the sensible pick. You'll change thread more often, but you'll spend less and take up less space. The Occupational Safety and Health Administration guidance on workstation setup is worth a look if you're planning long stitching sessions, since posture and lighting matter more than most buyers expect.
For a home business, multi-needle changes the economics: thread changes eat time, and time is the product you're selling. A six-needle machine running a six-color logo unattended is a different business tool than one needing you for every color.
The limitation: multi-needle machines cost more, weigh more, and need more maintenance. Under ten items a week, that investment rarely pays back.
| Machine Type | Thread Changes | Best For | Main Drawback |
|---|---|---|---|
| Single-needle | Manual, every color | Hobbyists, small gifts | Slow on multi-color work |
| Multi-needle | Automatic | Home businesses, production | Higher cost and footprint |
The features worth paying for reduce mistakes, not impress on a spec sheet. Four categories decide your day-to-day experience: hoop size, connectivity, file formats, and screen.
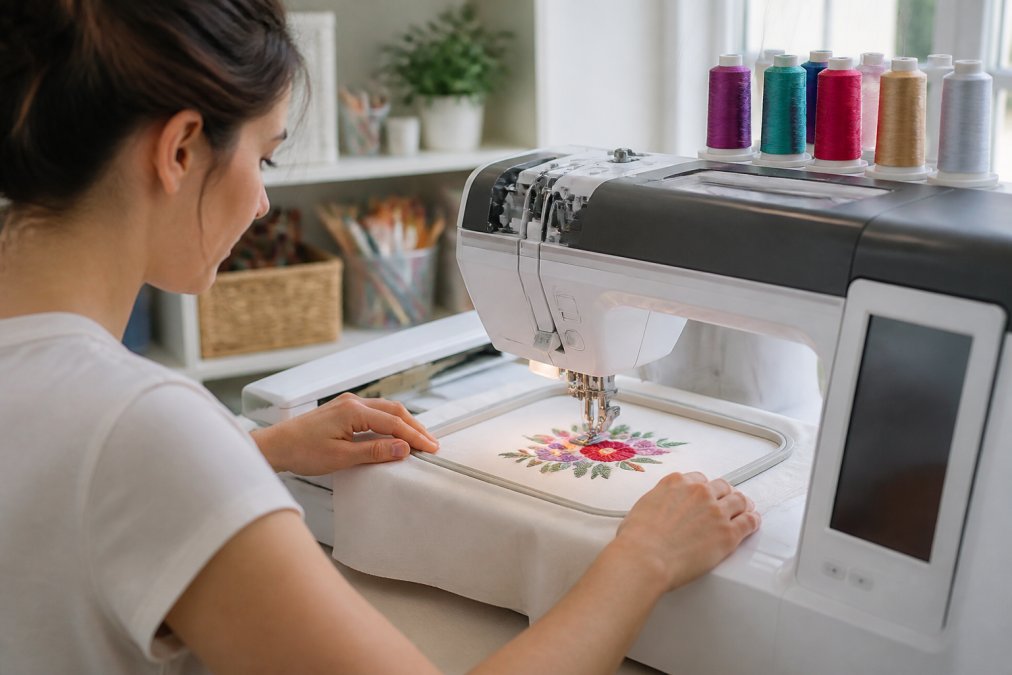
The embroidery field is the maximum area the machine can stitch in one hooping. A 4x4-inch field handles monograms and small logos; 5x7 opens shirt fronts and totes; jacket backs and quilt blocks need 6x10 or bigger.
Buy hoops matching your machine's field, not bigger ones, a larger hoop means repositioning and re-hooping mid-design, where alignment errors creep in.
Connectivity decides how designs reach the machine. USB is the baseline; Wi-Fi and app-based transfer, like the CREATIVATE™ connectivity on the SINGER® SE9180 Sewing & Embroidery Machine, skip the flash drive.
File formats matter too. PES and DST are the most common, and most machines read several. Check compatibility before buying a design bundle, a file you can't open is worthless.
A touchscreen with on-screen editing lets you resize, rotate, and reposition designs without a computer, for beginners, the single most useful feature here.
The best sewing machine for embroidery covers your largest realistic project without overspending on unused capacity. But "budget" means two numbers, and confusing them causes buyer's remorse by month three.
The first is sticker price; the second is what the machine costs to own and run the first year. Most guides stop at the first number, that's the mistake.
Embroidery machine pricing clusters into rough bands, and your band should follow from your largest project and weekly volume, not what's on sale.
Within any band, the deciding features reduce mistakes: hoop size, screen quality, thread break sensing, and automatic thread cutting.
The machine is the down payment; supplies are the mortgage.
A hobbyist stitching a few projects a month can expect first-year supplies to run a meaningful fraction of an entry-level machine's price; a home business can see supplies rival or exceed the machine cost within a year. The drivers: The drivers:
Two features are worth paying more for at any budget: an automatic needle threader and an automatic thread cutter. Both save minutes that compound across a season. A thread break sensor is the third, it stops the machine when thread snaps, preventing the tangle that ruins a nearly finished design.

Beginners often look at the used market to stretch a budget, and that can work, but only with inspection. Before buying any used embroidery machine, verify:
Refurbished units from a dealer with a warranty are usually safer than a private-party sale with no recourse. The savings are real, but so is inheriting someone else's maintenance neglect.
The sticker price is the smallest number here. Total cost of ownership includes stabilizer, bobbins, needles, thread, digitizing, maintenance, and the space the machine occupies.
Stabilizer is the hidden expense most beginners underestimate, every project consumes it, and different fabrics need different types. The Pocket Guide to Stabilizers stops the guessing, and Wash-Away Stitch Stabilizer handles delicate fabrics and hard-to-hoop pieces like cuffs and denim. Keep spare bobbins on hand; a 10-pack of Class 15/A bobbins costs less than one ruined project.

Space and ergonomics catch people too. A multi-needle machine needs a sturdy table, room for cones, and clearance behind it for the hoop. Measure before you buy.
Digitizing converts artwork into a stitch file the machine reads. You can buy pre-made designs, pay per file, or learn the software yourself.
Pre-made designs are cheaper and faster for monograms and simple logos. Custom digitizing is essential when the artwork is yours or your customer's. Learning the software takes time but removes a per-design cost that adds up fast for a business.
For a hobbyist, pre-made designs plus occasional paid digitizing is the practical route. For a home business with recurring clients, digitizing skills or a reliable digitizer become a line item worth budgeting for.
Essential embroidery machine supplies fall into four groups: consumables, hooping tools, design assets, and workspace. Budget for all four before buying the machine, most guides ignore the fourth, the one that surprises people.
Consumables scale with how much you stitch, so your supply budget is a per-project budget times your project count.
Learning often involves wasted stabilizer and test stitches. Plan for it.
Hooping tools include the hoops, adhesive sprays for tricky fabrics, and good embroidery scissors. Buy hoops matching your machine's field, not bigger ones, a larger hoop means repositioning and re-hooping mid-design, where alignment errors creep in.
Design assets are your files. Pre-made designs are cheaper and faster for monograms and simple logos; custom digitizing is essential when the artwork is yours or your customer's. Hobbyists do fine with pre-made plus occasional paid digitizing; home businesses with recurring clients should budget for digitizing skills or a reliable digitizer.
An embroidery machine isn't a sewing machine you can tuck in a closet. It needs a dedicated footprint that grows with the machine.
Measure your space before you buy. A machine that fits your budget but not your room is still wrong.
A common mistake is buying the machine first and discovering supply costs afterward. Set aside a supply budget alongside your machine budget and treat it as part of the purchase, many businesses find first-year supplies cost a meaningful fraction of the machine itself, before the table, lighting, and storage it requires.
The U.S. Small Business Administration's guidance on starting a home-based business is a useful reference if you're turning embroidery into income, since it covers the recordkeeping and registration basics that hobby guides skip.
Hobbyists and home business owners need different machines, and confusing the two is the most expensive mistake here. Hobbyists stitch for enjoyment and gifts; home businesses stitch to a deadline, for a customer, at repeatable volume.
A hobbyist can thrive on a single-needle machine with a 5x7-inch field and a good touchscreen. A home business needs multi-needle capability, a larger embroidery area, higher speed, and a machine built for daily use. Dealer support and warranty coverage matter more in business, because downtime costs money.
Semi-professional stitchers selling occasionally sit in between: a mid-range single-needle machine with a large field and reliable connectivity, upgrading to multi-needle once order volume justifies it.
| Use Case | Recommended Setup | Key Priority |
|---|---|---|
| Hobbyist | Single-needle, 5x7 field | Ease of use |
| Semi-professional | Single-needle, large field | Reliability |
| Home business | Multi-needle, 6+ needles | Speed and uptime |
One more consideration: maintenance and longevity. Clean and oil on the manufacturer's schedule, replace needles regularly, and keep the bobbin area lint-free. Routine care adds years of life, and a warranty is only useful if you've followed the maintenance terms.
Choosing an embroidery machine comes down to matching capacity to real projects, and that's harder than it sounds when every spec sheet looks impressive. Stitch Pro Supply was built around a simple idea: learn first, shop second. Our team helps you work through hoop size, connectivity, and total cost of ownership before you commit, and our curated selection includes machines like the SINGER® SE9180 with the touchscreen and CREATIVATE™ connectivity beginners actually use. Get started with Stitch Pro Supply and choose a machine you'll still be happy with a year from now.
Prioritize hoop size and embroidery field, since these limit what designs you can stitch. Look for an automatic needle threader, thread break sensor, and adjustable presser foot pressure. A touchscreen interface and USB connectivity make loading designs easier. If you plan to do both sewing and embroidery, a combo machine like the SINGER SE9180 at $799.99 covers both. Check stitch count capacity and whether the machine accepts PES and DST file formats before buying.
It depends on your workload. A combo machine handles both sewing and embroidery, which saves money and space for hobbyists. Dedicated multi-needle machines change thread colors automatically and run faster, which matters if you sell products or take on production work. For occasional personal projects, a combo unit is usually the smarter buy. For an Etsy shop with daily orders, a multi-needle setup pays for itself in time saved.
Not always. Most machines come with built-in designs and accept pre-made files in PES or DST format, so you can start stitching immediately. Digitizing software becomes necessary when you want to convert your own artwork or logos into stitch files. That software ranges widely in price and has a real learning curve. Start with pre-made designs, then add digitizing software once you know which designs your projects actually need.
Entry-level combo machines start around $400, while feature-rich models like the SINGER SE9180 run $799.99. Multi-needle commercial machines climb into the thousands. Budget beyond the machine itself: stabilizers, bobbins, and thread add up quickly. A 10-pack of Class 15/A bobbins costs $3.99, and a stabilizer guide runs $8.50. Factor in these supplies before committing to a price point so the total cost does not surprise you later.


