Your Cart (0)
Your cart is empty
Tax included and shipping calculated at checkout
Drawer menu
Tax included and shipping calculated at checkout

Last Updated: October 9, 2026
Yes, one machine can handle embroidery quilting, and for many home sewists it already does. If you own a combination sewing and embroidery machine, you can quilt small and medium projects today without buying anything else.

At Stitch Pro Supply, we hear this question constantly from makers who want to quilt but don't have room for a longarm. The short answer: your hoop size decides what you can finish, not the machine's label.
Embroidery quilting is the process of stitching quilting designs through a layered quilt sandwich using an embroidery machine's hoop and programmed stitch files, rather than moving the fabric freely by hand.
That distinction matters. It changes how you prepare the quilt, how you position each pass, and how big a finished quilt can realistically be.
Below, we'll walk through the full workflow, the size limits nobody warns you about, and how to pick a machine that won't leave you stuck.
Embroidery quilting moves the hoop while the machine stitches a programmed design. Free-motion quilting moves the fabric by hand under a lowered feed dog. Walking-foot quilting uses a special presser foot that feeds all three layers together in straight lines.
The practical differences show up fast:
What most guides miss is that these are not competing skills. Quilters who master both use embroidery for borders, medallions, and repeatable motifs, then switch to free-motion for open filler areas.
If you're coming from hand-guided quilting, expect the learning curve to be about hooping, not stitching. The machine does the hard part.
The workflow has two phases: building the sandwich, then stitching it in sections. Get the first phase right and the second phase almost runs itself.
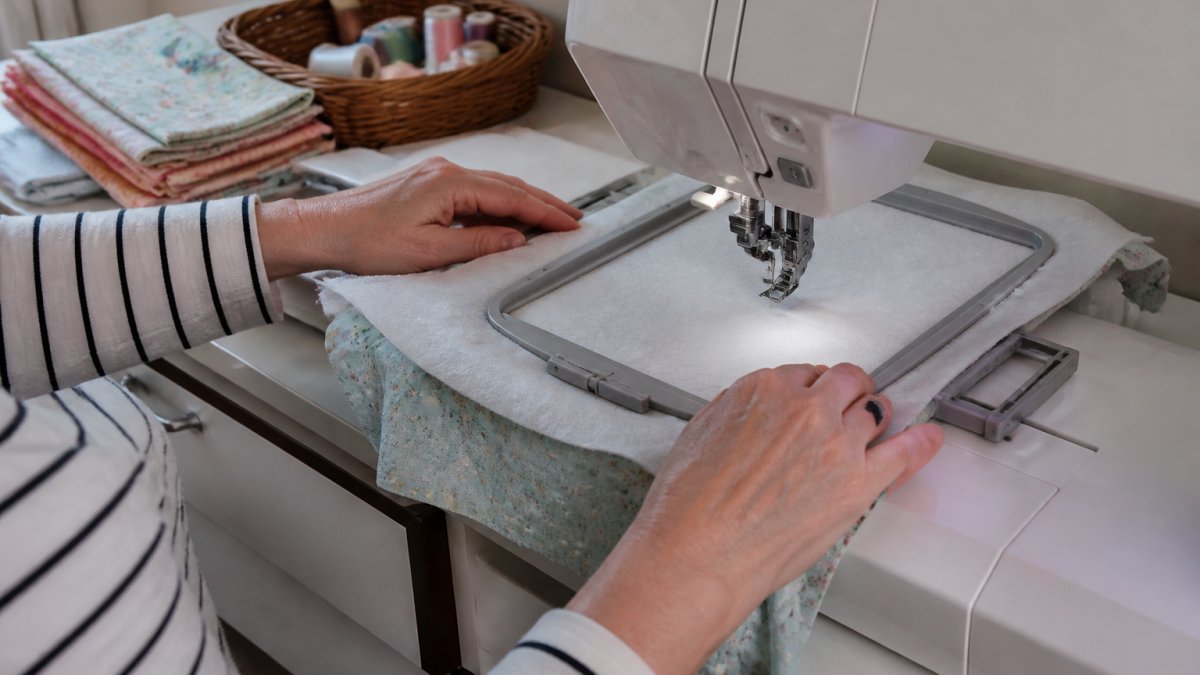
Your quilt sandwich is the three-layer stack: quilt top, batting, and backing fabric. All three layers must be flat, aligned, and held together before any stitching starts.
Here's the order that works:
Basting is not optional. Shifted layers produce puckers that no amount of thread tension adjustment will fix.
For hoop-sized projects, spray basting is fastest. For anything you plan to rehoop, pin basting holds up better during handling.
Load your chosen quilting design, then hoop the sandwich so the design area sits centered and taut.
Run the stitch. When it finishes, unhoop, move the sandwich to the next position, and hoop again. This is rehooping, and it's how you cover a quilt larger than your hoop.
Two rules keep multi-hoop work aligned:
Expected result: a continuous quilted surface with no visible gaps and no puckered seams.
The honest limit is your hoop area, not your ambition. A standard hoop handles small projects easily. Larger quilts need multiple hoopings, and each one adds alignment risk.
Here's how project sizes typically break down:
| Project Size | Typical Approach | Main Challenge |
|---|---|---|
| Small projects (pillows, table runners, wall hangings) | Single hooping | Design placement |
| Medium projects (crib quilts, lap quilts) | Two to four hoopings | Alignment between passes |
| Large quilts (bed-size) | Many hoopings or a different method | Repositioning accuracy and time |
Harp space and throat space matter too. That's the distance from the needle to the machine's tower. More room means less fabric bunching as you work toward the center of a bigger quilt.
A common mistake is buying a machine for the embroidery design count and ignoring hoop dimensions. The design library is replaceable. The hoop size is not.
HUSQVARNA® VIKING® DESIGNER QUARTZ™ 29 Sewing & Embroidery Machine →
A good embroidery machine for quilting gives you a large hoop, generous throat space, and reliable stitch quality at speed. Everything else is a bonus. The gap most buyers fall into is shopping by design count instead of by the numbers that actually determine whether a quilt fits.
Start with the four specs that decide what you can finish:
Run this checklist before you buy:
The HUSQVARNA® VIKING® DESIGNER QUARTZ™ 29 Sewing & Embroidery Machine hits most of these.
For a lower entry point, the SINGER® SE9180 Sewing & Embroidery Machine gives you over 150 built-in embroidery designs, over 250 stitches, a 7" touch screen, and an automatic needle threader at $799.99. It's a solid first combination machine.

If quilting is the priority and embroidery is secondary, the SINGER® Patchwork 7285Q Sewing & Quilting Machine is built for it. It has 203 stitch applications, programmable needle up/down, and 5.5 inches of throat space at $279.99. No embroidery arm, but strong quilting fundamentals.
American Quilter's Society resources on quilting techniques
Yes. A combination machine sews and embroiders in one unit, which is exactly what most home studios need.
The trade-off is real, though. Combination machines rarely match a dedicated embroidery-only machine on hoop size at the same price. They also can't match a longarm for bed-size quilting.
So the honest answer depends on your project mix:
This is where our "Learn First. Shop Second." approach earns its keep. We'd rather talk you out of the wrong machine than sell you one you'll outgrow in six months.
Most embroidery quilting problems trace back to four causes: tension, stabilization, hooping, or needle condition. Fix those and stitch quality follows. Here is how to diagnose each symptom and what to change.
Puckering (fabric drawn in around the stitching). This usually means the sandwich was not taut in the hoop or the stabilizer was too light for the design density.
Shifting layers (batting or backing slides out of alignment). This happens when basting was insufficient or the hoop was moved between passes.
Thread breaks. The most common causes are incorrect threading, a worn needle, wrong thread weight for the design, or too much tension on the spool.
Skipped stitches. These often come from a bent or dull needle, incorrect needle size for the fabric, or the presser foot riding too high on thick batting.
Misalignment between passes. This is the most common failure in multi-hoop quilting. It comes from imprecise repositioning.
Needle and thread choices matter more than most people expect. A fresh needle and a thread weight matched to your design density prevent most skipped stitches.
Yes. A combination sewing and embroidery machine can quilt small and medium projects and embroider on top of them, using built-in quilting designs or embroidery designs sized to fit the hoop. The limits are hoop size, throat space, and how much fabric weight the machine can move without distortion. For a large quilt, plan on multiple hoopings and repositioning, or use a longarm instead.
The main limits are hoop area, throat space, and how much bulk the machine can handle. A 170 mm x 100 mm hoop covers only a small section, so a bed-size quilt needs many rehoopings. Thick batting, dense quilting designs, and heavy fabric layers can cause thread breaks, skipped stitches, and fabric shifting. Sample squares first to check stitch density and tension before committing to the full quilt.
Not necessarily. A sewing machine for quilting and embroidery handles piecing, quilting, and embroidery in one unit, which saves space and money. A dedicated quilting machine is worth adding only if you regularly finish bed-size quilts with free-motion work, because the longer throat space and larger table make that job far easier. For wall hangings, baby quilts, and quilt-as-you-go blocks, one combination machine is enough.
Yes. Many embroiderers use built-in quilting designs, edge-to-edge patterns, and motif designs sized to the hoop. Stitch a sample square with the same batting, backing, and stabilizer first, then check stitch density and alignment. For an all-over look, use a repeating design and rehoop in a grid so the motifs line up across the quilt surface.


