Your Cart (0)
Your cart is empty
Tax included and shipping calculated at checkout
Drawer menu
Tax included and shipping calculated at checkout

Last Updated: September 10, 2026
A sewing machine for embroidery is not simply a sewing machine with decorative stitches. The real difference comes down to how the fabric moves. A standard sewing machine feeds fabric forward and backward under a fixed needle (britannica.com). An embroidery machine locks the hoop in an embroidery arm and moves the fabric side to side, forward and back, following a digitized pattern automatically.
That distinction shapes everything else: the hoop size you can use, the file formats the machine reads, and the amount of babysitting each project demands. This guide walks through what actually matters when you're comparing machines, from combo units to dedicated embroidery setups.
Most buyers focus on stitch counts and built-in designs. The smarter question is whether you want to sew garments and quilts, or produce embroidered goods at volume. The answer decides which machine class fits.
A sewing and embroidery machine combo does both jobs in one unit: it sews standard seams and quilts, then switches to embroidery mode when you attach the embroidery unit. For hobbyists with limited space, that dual function is the whole appeal.
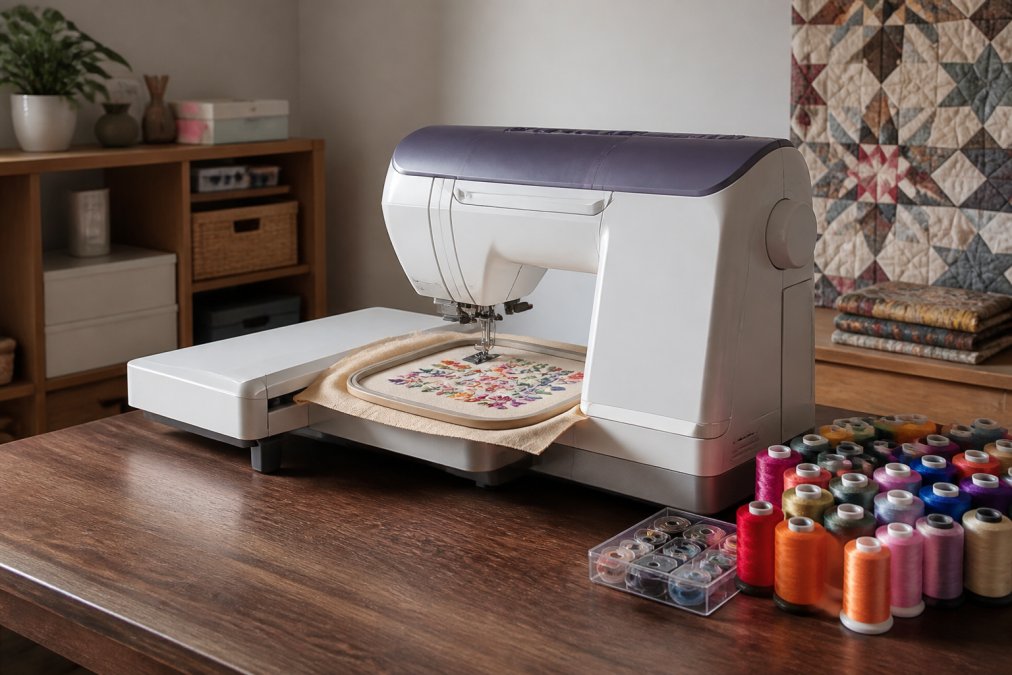
Setup typically takes a few minutes. You remove the standard presser foot, slide on the embroidery arm, mount the hoop, and load a design through the touchscreen or USB. Switching back means reversing those steps, which is why most owners keep one machine in embroidery mode for a whole session rather than flipping back and forth mid-project.
A combo makes sense if you sew and embroider in roughly equal measure and have one workspace. It falls short when you run production embroidery, where a dedicated multi-needle machine's speed and thread capacity matter more than versatility.
| Situation | Combo Machine | Dedicated Embroidery Machine |
|---|---|---|
| Hobby sewing plus monogramming | Strong fit | Overkill |
| Quilting and light embroidery | Strong fit | Limited |
| Etsy production runs | Workable | Better fit |
| Limited studio space | Best fit | Needs its own space |
Learning how to choose an embroidery machine comes down to four specs: embroidery field size, hoop compatibility, connectivity, and the software ecosystem. Everything else is secondary.
The embroidery field is the largest area the machine can stitch in one hooping. A small field handles monograms, small logos, and pocket designs. A larger field opens up jacket backs, quilt blocks, and full-front designs. Hoop size and embroidery field are related but not identical: a machine may accept a large hoop but only stitch within a smaller field.
If your projects are mostly personalization, a modest field works. If you plan to embroider quilt panels or apparel fronts, buy the largest field your budget and space allow.
Most current machines read PES, DST, and a handful of other formats through USB connectivity or a direct connection. The bigger question is digitizing software: the program that converts artwork into a stitch file. Some machines bundle a basic version; others leave you to buy third-party software separately.
A common mistake is assuming built-in designs are enough. They aren't, once you want a custom logo or a specific font. Budget for digitizing software from the start, and check that it exports the file format your machine reads before you buy either one.
Essential embroidery supplies for starters are stabilizer, the right bobbin thread, embroidery-specific needles, a seam ripper, and sharp scissors. Skipping any of these causes most beginner problems.
Stabilizer is the one beginners underestimate. It supports the fabric so stitches don't pucker or sink. Cut-away stabilizer suits stretchy knits; tear-away works for stable wovens. Bobbin thread is lighter than standard sewing thread so the back stays clean (brother-usa.com). Embroidery needles have a larger eye and sharper point than universal needles, which reduces thread breakage and skipped stitches (schmetz.com).
Beginners should prioritize an automatic needle threader, a bobbin sensor, and a clear touchscreen interface over a large embroidery field. Those three features remove the friction that makes new owners quit.
Advanced users and small production shops should look at embroidery speed, multi-needle capability, and pattern editing on the machine itself. Pattern editing lets you resize, rotate, and combine designs without returning to the computer, which matters when you're running repeat orders.
The trap for beginners is buying for the crafter they hope to become. A machine with every feature but a steep learning curve often sits unused. Start with something that sews and embroiders reliably, then upgrade once you know your actual workflow.
The purchase price is the smallest part of long-term cost of ownership. Thread, stabilizer, needles, bobbins, and digitizing software all add up over the first year, and most buyers don't budget for them. This is the section most guides skip entirely, and it's the one that determines whether the hobby stays affordable or becomes a money pit.
Consumables are not a one-time purchase. They run out, and they run out faster than beginners expect:
A useful mental model: for every hour of stitching, expect a proportional spend on thread, stabilizer, and needles. The exact figure varies by design density and fabric, but the pattern is consistent, consumables are a recurring cost, not a startup cost.
A combination machine's footprint is not the machine's footprint. When the embroidery arm is attached, the machine needs clearance behind and beside it for the arm to travel. On many combo units, the embroidery arm extends several inches to the rear and the hoop swings through a wide arc.
Practical implications:
If space is tight, measure the machine with the embroidery arm attached before you buy, not the machine alone. A dedicated table at a comfortable height beats a cramped corner every time.
Firmware updates are another item to track. Manufacturers release updates that fix bugs and add features, and applying them keeps the machine running current. Check your machine's support page periodically rather than assuming it ships fully up to date.
Beyond firmware, plan for routine maintenance: cleaning lint from the bobbin area, oiling where the manual specifies, and having the machine serviced periodically if you stitch heavily. These costs are small individually but real over the life of the machine.
Thread breakage, puckered fabric, and birdnesting under the hoop are the three most common embroidery problems, and all three trace back to tension, stabilizer, or needle choice. Fix the cause, not the symptom.
Stitch density plays a role too. Designs digitized too densely for the fabric cause puckering and needle strain, which is why quality digitizing matters as much as machine specs.
Choosing the best sewing machine for embroidery means matching the machine to how you actually work, not to a spec sheet. Decide whether you need a combo unit or a dedicated machine, then weigh hoop size, software, and the supplies you'll need from day one. Our Learn First. Shop Second. philosophy means we help you understand the tradeoffs before you spend, with expert support, carefully selected supplies, and trusted brands behind every recommendation. Choose your machine with confidence.
For beginners, look for a single-needle machine with a hoop size of at least 4x4 inches, an automatic needle threader, and USB connectivity for design transfer. A sewing machine for embroidery with a built-in bobbin sensor and adjustable tension saves hours of frustration. Combo machines let you sew garments and embroider in one unit, which suits most first-time buyers who want flexibility without buying two machines.
A sewing and embroidery machine combo works well if you have limited space or a modest budget and plan to alternate between sewing and embroidery. Separate machines make sense if you run an Etsy shop or take on production work, because you can sew and embroider at the same time. Multi-needle embroidery-only machines also change threads faster, which matters for monogramming and batch orders.
You need a machine with an embroidery arm, a hoop system, and the ability to read design files such as PES or DST. Computerized sewing machines with an embroidery unit attached cover most home use. Dedicated embroidery machines skip sewing functions entirely and focus on stitch density, embroidery speed, and hoop capacity. Either path works, but check hoop size and digitizing software compatibility before you buy.
Start with cut-away and tear-away stabilizer, embroidery bobbin thread, 40-weight polyester or rayon top thread, sharp embroidery needles, and a pair of curved snips. A water-soluble topper helps on towels and fleece, and a can of temporary spray adhesive keeps fabric from shifting. These essential embroidery supplies for starters usually cost far less than the machine itself but make the biggest difference in stitch quality.
